


Getting the perfect jar cure for your marijuana can feel a bit like crafting the perfect cup of coffee. It’s all about patience, timing, and just the right conditions. If you’re new to the process, don’t worry. I’m here to walk you through it with a few laughs and some handy tips along the way. Just think of it as a conversation between friends about preserving your favorite buds.
In the following sections, we’ll cover everything from what jar curing is, to the step-by-step process, and the benefits it brings to your marijuana experience. Let’s jump right in and get those buds cured to perfection!
What is Jar Curing?
Jar curing is a method used to preserve and enhance the quality of marijuana after it’s been harvested. Think of it like aging wine, where time and the right environment make all the difference. By placing dried buds in airtight jars, the slow and steady cure allows the natural flavors and potency to develop, giving you a smoother and more enjoyable smoke.
But why jars, you ask? Well, jars are perfect because they’re airtight, allowing you to control humidity and prevent excess moisture from escaping. This sealed environment helps maintain the delicate balance needed for a good cure. It’s about as close as you can get to a magical little greenhouse for your buds.
With jar curing, you’re not only preserving your marijuana, but you’re also unlocking its full potential. The process takes a bit of time, but trust me, the results are worth the wait. Let’s look at how you can kick off this curing journey.
Prepping Your Harvest
Before you start curing, you’ve got to make sure your marijuana is prepped and ready to go. This means trimming and drying your buds properly. Think of it as getting your ingredients ready before baking a cake; each step sets the foundation for the final product.
First, trim your buds to remove any excess leaves and stems. You want to focus on the flower, as that’s where all the good stuff — like cannabinoids and terpenes — are concentrated. Use sharp scissors or pruning shears to make clean cuts and avoid damaging the delicate trichomes.
Next, ensure your buds are properly dried. This step is crucial because curing wet or improperly dried buds can lead to mold, and nobody wants that. Hang your trimmed buds upside down in a dark, well-ventilated area for about 7-14 days. You’ll know they’re ready when the stems snap easily instead of bending.
Once your buds are trimmed and dried, you’re ready to move on to the main event: jar curing. But remember, patience is your best friend here.
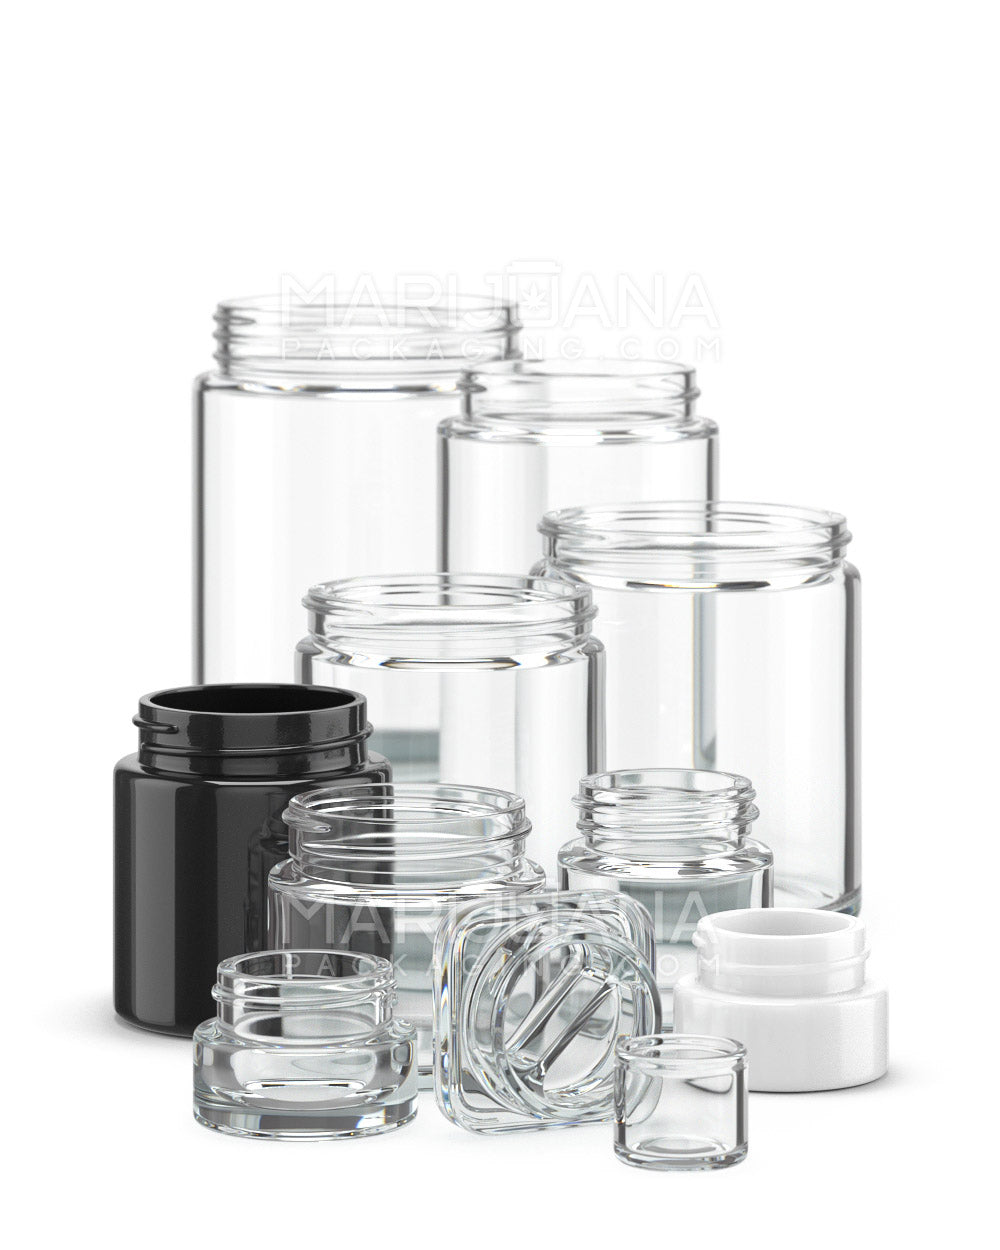
Choosing the Right Jar
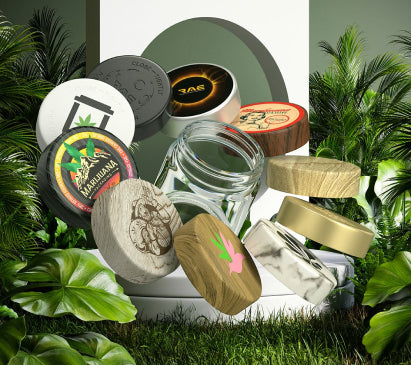
Picking out the right jar is like choosing the right tool for a job. You want something that seals well and doesn’t add any unwanted flavors to your buds. Mason jars are a popular choice because they’re airtight, easy to find, and made of glass, which won’t interfere with the curing process.
When selecting jars, consider the size of your harvest. You’ll want to fill each jar about three-quarters full, leaving enough room for air circulation. This space is important because it allows your buds to breathe and prevents them from getting squished against each other.
Avoid using plastic containers, as they can leach chemicals and are not as effective at creating an airtight seal. Stick to glass jars with tight-fitting lids, and you’ll be set for a successful cure.
Now that you’ve got your jars ready, it’s time to learn the art of filling them.
Filling the Jars
Filling your jars is a bit like packing a suitcase for vacation — you want to organize things just right. Gently place your dried buds into the jars, filling them about three-quarters full. This allows for adequate air circulation, which is key to a successful cure.
Make sure your hands are clean to avoid transferring oils or contaminants to the buds. Handle them carefully to preserve the trichomes, as these tiny resin glands hold the majority of your marijuana’s potency and flavor.
Once your jars are filled, seal them tightly to create an airtight environment. If you’re feeling fancy, you can even label your jars with the strain name and date to keep track of your curing progress. It’s a small step, but it adds a touch of organization and helps you monitor how long each batch has been curing.
With your jars filled and sealed, you’re ready to start the curing process. Let’s explore what comes next.
Monitoring Humidity and Temperature
When it comes to curing marijuana, keeping an eye on humidity and temperature is like being a weather forecaster for your buds. Both factors play a significant role in ensuring a smooth and flavorful cure.
Ideally, you want to maintain a relative humidity level of 55-65% inside the jars. This range is perfect for allowing your buds to cure slowly without drying out or becoming too moist. You can use small hygrometers to monitor the humidity inside each jar. These handy devices are inexpensive and can be easily placed inside the jar to give you accurate readings.
Temperature is another critical element to consider. Aim for a consistent temperature between 60-70°F (15-21°C). Extreme temperatures can affect the potency and flavor of your marijuana, so it’s essential to store your jars in a cool, dark place, away from direct sunlight or heat sources.
By keeping an eye on humidity and temperature, you’re setting the stage for a flawless cure. Let’s move on to the next step in the process.
Burping the Jars
Burping your jars is a bit like letting the air out of a balloon — it’s necessary for balance. This step involves opening the jars daily to release excess moisture and allow fresh air to circulate. It’s a simple but important part of the curing process that helps maintain the right humidity level and prevents mold growth.
For the first week, open your jars for about 10-15 minutes each day. This allows any built-up moisture to escape and fresh air to enter. You can gently shake the jars or lightly stir the buds to ensure even air distribution.
After the initial week, you can reduce the frequency of burping to every few days. As the curing process continues, you’ll notice the aroma of your buds becoming more pronounced and the texture improving.
By regularly burping your jars, you’re ensuring your marijuana cures evenly and maintains its quality. The process might seem tedious, but it’s a small effort compared to the rewards you’ll reap.
Understanding the Curing Timeline
Now that you’re familiar with the steps, you might be wondering how long this whole curing process takes. Well, curing isn’t a race, it’s more like a marathon. You’re in it for the long haul, but the finish line is worth it.
The curing timeline can vary depending on personal preference and the strain you’re working with. Generally speaking, a good cure takes anywhere from 2-4 weeks. However, some connoisseurs prefer to cure their marijuana for up to 6 months for maximum flavor and smoothness.
During the curing process, the chlorophyll in the buds breaks down, reducing harshness and enhancing flavor. The longer you cure, the more pronounced these benefits become. But be careful not to over-dry your buds, as they can become brittle and lose potency.
The key is to find the sweet spot that suits your taste and preference. Patience is your ally here, and the results will be well worth the wait.
Signs of a Successful Cure
So, how do you know when your marijuana is cured to perfection? A successful cure is like the moment you take a bite of a perfectly baked cookie — everything just feels right.
Here are some signs to look out for:
- Aroma: Your buds should have a rich, pungent aroma that’s characteristic of their strain. If they smell off or musty, it might be a sign of mold or improper curing.
- Texture: Cured buds should feel slightly sticky but not wet. They should have some give when gently squeezed but shouldn’t crumble into dust.
- Flavor: A well-cured bud will have a smooth, flavorful smoke that’s easy on the throat. If it tastes harsh or grassy, it might need more time to cure.
By keeping an eye on these indicators, you’ll be able to gauge the progress of your cure and enjoy the fruits of your labor when the time is right.
Storing Your Cured Marijuana
Once your marijuana is perfectly cured, it’s time to think about storage. Proper storage is like putting your favorite sweater away for the season — you want it to be just as nice when you take it out later.
Keep your cured buds in airtight jars in a cool, dark place. This environment helps preserve the potency, flavor, and aroma of your marijuana. Avoid exposure to light, heat, and moisture, as these factors can degrade your buds over time.
If you’re storing your marijuana for an extended period, consider using vacuum-sealed bags or containers with humidity packs to maintain optimal conditions. These tools help ensure your marijuana stays fresh and flavorful for months to come.
By taking the time to store your cured marijuana properly, you’re safeguarding all the hard work you put into the curing process.
Final Thoughts
Jar curing is a rewarding process that brings out the best in your marijuana. By following the steps outlined here and being patient, you’ll enjoy a smoother, more flavorful smoke that showcases the unique characteristics of your chosen strain.
If you’re looking to step up your curing game, Gamut offers a wide range of packaging solutions to help you store and preserve your marijuana with ease. From jars to humidity packs, Gamut covers the entire spectrum of packaging solutions, ensuring your buds are always in the best hands. Trust in Gamut to help make your curing experience even better.